Your First Hour Is a Trap — Here's How to Escape It
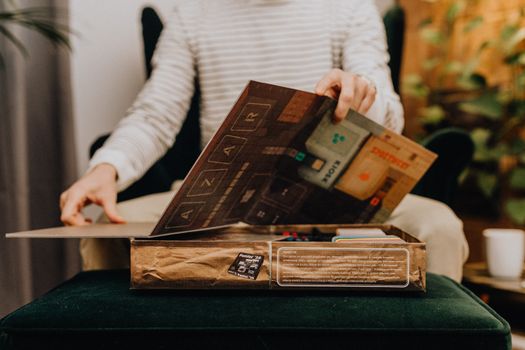
Omega Labyrinth Life front-loads its worst design decisions. The opening garden tutorial teaches you to plant seeds, water them, and wait. It does not teach you that this waiting is optional, that your first dungeon run determines your entire power curve, or that the "life sim" half of the game is a resource engine you should ignore until it becomes useful. The correct first-hour priority is simple: clear the first dungeon floor, die intentionally with a full inventory, and unlock the appraisal shop before you plant your third seed. Everything else is noise.
The Tutorial Under-Explains the One System That Matters
The Breast Expansion (BEP) mechanic is not cosmetic. It is your primary stat scaling system, and the game explains it like a joke. Here's what actually happens: collecting Omega Power in dungeons increases your characters' chest size, which directly raises their maximum HP, SP, and base attack values. The larger the size, the bigger the numbers. The tutorial mentions this once, with a wink, and never explains the breakpoints.
Hidden variable: BEP growth is not linear. Each cup size requires more Omega Power than the last, but the stat thresholds are fixed at specific sizes. This means hoarding Omega Power for a single massive run is often worse than multiple medium runs where you deliberately extract at size thresholds. The game never tells you the thresholds. You learn by checking your status screen and noting when base HP jumps — usually around every third size increase.
The trade-off most players miss: BEP resets on death or dungeon exit. So does your inventory. This creates the central tension of early play. You can push deeper for more Omega Power and bigger stats, but one trap tile or ambush erases everything. The "safe" play — clearing floors methodically, using items, preserving health — actually wastes time because you extract with less Omega Power and smaller permanent gains.
Decision shortcut: The first dungeon (Beginner's Forest) has a fixed layout for Floor 1. Learn the exit tile location. Run straight to it, killing nothing, grabbing Omega Power crystals only if they're directly in your path. Extract at the exit with whatever BEP you've gained. Repeat three to four times. Your base stats will be higher than someone who cleared to Floor 3 "safely" once and died. Speed beats depth in the first two hours.
Three Early Mistakes That Waste Your Run
Mistake 1: Planting crops before you unlock the Appraisal Shop
Seeds found in dungeons are unidentified. The garden grows them into random crops. Some are healing items worth keeping. Most are worthless. The Appraisal Shop (unlocked after your first dungeon extraction) lets you identify seeds before planting. Planting blind in Hour 1 means wasting garden space on stat-debuffing "Rotten" crops that you then have to manually remove. The garden has limited plots early. Each wasted plot is a lost healing item for your next run.
The asymmetry: Identified seeds can be sold for early currency. Unidentified seeds planted and grown into garbage cost you time to remove and replant. The "safe" garden play is actually the risky one.
Mistake 2: Using healing items in dungeons
Dungeon items do not persist. Your inventory empties on exit or death. Healing items are plentiful in dungeons and should be used aggressively — but only items you found in that dungeon. Items you brought from your garden or shop stock are permanently consumed. New players hoard "good" items, die with them, and lose them forever. The correct play: use found items freely, extract with empty inventory slots filled with unidentified gear, and never bring consumables into a dungeon until you understand the extraction mechanics.
Mistake 3: Ignoring the "Curse" equipment system
Cursed weapons and armor drop constantly. They have negative effects — reverse controls, HP drain, random teleportation — and cannot be removed once equipped without a specific scroll. The tutorial warns you once. Players avoid them entirely. This is wrong. Cursed items have significantly higher base stats than uncursed items at the same item level. The correct early play is to equip cursed items in safe rooms (no enemies), note the curse effect, and decide if you can play around it for that floor. Reverse controls is manageable. Random teleportation is not. The judgment call — "can I handle this curse for three more floors?" — is the core skill the game actually tests.

The Next Three Decisions That Shape Everything
After your first few extractions, three branching choices appear. Each locks in assumptions that persist for ten-plus hours.
Decision 1: Which character to main?
The game gives you multiple students, but your "main" determines which skill tree advances and which BEP scaling applies. Pai's skill tree favors critical hits and burst damage. Rio's favors sustain and trap resistance. The hidden variable: BEP scaling differs by character. Pai gains more attack per size increase. Rio gains more HP. Early dungeon enemies have low enough defense that Pai's attack scaling lets you one-shot threats you would otherwise trade hits with. Trading hits means using healing items. Using healing items means fewer inventory slots for extraction loot. The cascade matters.
Trade-off: Pai is less forgiving of mistakes. One trap tile at low HP ends the run. Rio lets you recover from errors but requires more Omega Power per floor to maintain kill speed. If your reflexes are reliable, Pai's snowball is stronger. If you're learning enemy patterns, Rio's buffer saves runs.
Decision 2: When to unlock the second dungeon?
The second dungeon (Mystic Cave) unlocks after clearing Floor 5 of Beginner's Forest. It offers higher-level drops and more Omega Power. It also has enemy types with elemental resistances and trap tiles that deal percentage-based damage, ignoring your HP buffer. The common mistake: rushing to unlock it because "higher level = better."
The shortcut: Farm Beginner's Forest until you can consistently reach Floor 5 without using items you brought from outside. This proves your base stats and player skill are sufficient. Entering Mystic Cave early means dying to percentage traps, losing your BEP progress, and rebuilding from zero. The game does not gate this. You must self-regulate.
Decision 3: What to spend your first 10,000 gold on?
The shop sells permanent upgrades, consumable buffs, and cosmetic items. The cosmetic items are expensive and do nothing. New players buy them because the characters comment on them. Do not. The permanent upgrade "Expand Inventory" (first level: ~8,000 gold) seems minor — +2 inventory slots. But inventory slots determine how much unidentified gear you extract per run. More extractions mean more appraisals. More appraisals mean more sellable items or usable equipment. The compound return over ten runs dwarfs any single consumable purchase.
The asymmetry: +2 slots is boring. A stat buff potion is exciting. The potion is consumed in one run. The slots persist forever. The correct early purchase is always boring.
What to Do Differently
Stop treating the garden as the game and the dungeon as interruption. The garden is a late-game engine that only becomes efficient after you have appraisal, expanded inventory, and identified high-value seeds. Your first ten hours are dungeon hours. Extract early, extract often, die with nothing rather than risk everything, and let your base stats accumulate through repetition rather than heroics. The players who clear Floor 10 in one run are showing off. The players who extracted fifteen times to get there are progressing.


