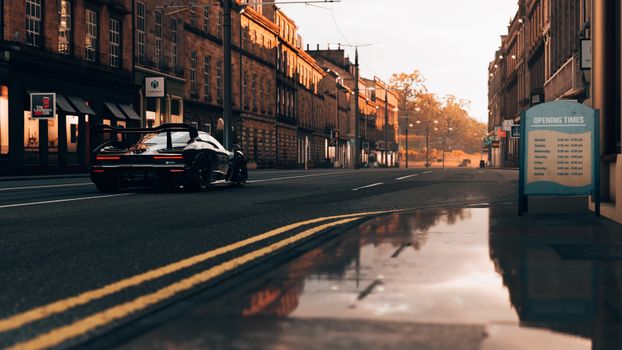
The opening hours of Forza Horizon 6 punish aggressive progression. If you max out your starting car's Performance Index immediately or leave driving assists on default, the game's hidden Drivatar scaling will lock you into a grind. The fastest route to the late game is ignoring the main festival board for thirty minutes, locking your assists on day one, and spending your first skill points on Car Mastery trees that lower upgrade costs.
Most beginner guides push you straight into the Horizon Festival main board. That is a trap. The game's progression algorithm weights your early race finishes to set the baseline aggression of the Drivatar AI field for your entire playthrough. Win too fast, too early, and every subsequent event scales to an uncomfortable difficulty spike that forces you into menu-heavy car tuning just to stay competitive.
The Drivatar Trap: Why Early Wins Hurt Late-Game Progression
Forza Horizon 6 uses a persistent Drivatar difficulty slider that operates behind the scenes. When you win your first few races by massive margins, the system registers a high skill ceiling and pushes the AI's PI and cornering aggression up. The mechanism: hidden backend variables track your average finish position and race margin during the first ten events. The outcome is a sudden wall in mid-tier festival events where AI cars gain supernatural cornering grip.
The fix is deliberately underperforming in your first three to five races. Finish mid-pack. Let the AI win. This anchors your Drivatar baseline lower, keeping the mid-game difficulty curve flat and saving you from grinding for specific car parts just to match artificially inflated AI stats.
Correction: Earlier Horizon titles tied this strictly to the visible difficulty dial. In FH6, the hidden scaling operates independently of your manual difficulty setting, meaning you can play on "Highly Skilled" and still trigger the aggressive AI by winning too much, too fast.
First-Hour Priority Checklist
Your first sixty minutes dictate your next twenty hours. Follow this sequence exactly.
- Finish the opening showcase. Do not restart for a better time. Placement does not grant hidden bonuses.
- Select an A-class base, not an S1. When given the initial car choice, pick the vehicle with the widest upgrade path (usually a balanced GT or sport compact), not the highest raw Performance Index.
- Lock your assists. Go to the settings menu before your first free roam. Turn off Traction Control and Stability Management if you have any sim experience. Leave them on only if you need them permanently—changing them later triggers a secondary difficulty recalculation.
- Ignore the main festival board. Drive to the nearest Roadside Barn find or collectible board instead. Building your car pool early prevents being locked into a single class requirement for festival events.
- Unlock the first satellite festival site. This expands your fast-travel grid and exposes discount vendors.

Car Mastery vs. Immediate Upgrades: Where Skill Points Go
When you earn your first skill points from drifting, speeding, and jumping, the menu tempts you to buy immediate car upgrades. Skip the part shop. The correct early-game investment is the Car Mastery tree.
The mechanism: Car Mastery nodes grant permanent passive bonuses to a specific vehicle chassis, including credit multipliers, XP boosts, and—critically—reduced costs for future part installs. The outcome is that spending 10 points on a single car's mastery tree will save you tens of thousands of credits when you eventually build it for late-game S2-class events.
Pick one car you enjoy driving. Dump your first 20 points into its mastery tree. Focus on the left or right branch (depending on the car) to hit the credit-boost cap before branching out.
Beginner Mistakes That Waste Time
What happens if you upgrade a car to max PI immediately?
You brick your upgrade economy. Maxing a car's PI locks you out of cheaper, lower-tier parts. If you auto-upgrade a car to S1 class using the quick upgrade button, you pay a premium for top-tier parts you don't need yet. When the game later requires a specific B-class or A-class vehicle for a championship, you have to buy an entirely new car instead of simply stripping parts off your existing one.
Why leaving ABS on default ruins your skill point farming?
ABS prevents lockups, which sounds safe. But the game's skill point system rewards near-misses, precise drifting, and clean cornering lines. ABS smooths out your inputs, which actively suppresses the "Clean Racing" and "Drift" skill chains. Turning ABS off (if you can handle it) dramatically increases the rate at which your skill multiplier builds during free roam.
Is the auction house worth touching in hour one?
No. The auction house in the early game is a credit sink. Prices are inflated by players who have already progressed past the early economy. You will overpay for a car you could unlock for free through a twenty-minute festival sponsorship contract. Ignore the auction house until you have at least 500,000 credits and a specific S1 or S2 build in mind.
Settings That Actually Matter
Most setting guides obsess over FOV and force feedback curves. For a beginner, those are marginal gains. The two settings that change your actual experience are the rewinds limit and the HUD configuration.
Rewinds: If you leave rewinds unlimited, you will unconsciously use them as a crutch, which stunts your ability to learn braking zones. Set a personal limit of three per race, or turn them off entirely for free roam.
HUD: Turn off the racing line. The dynamic racing line in FH6 is reactive, not predictive. It shows you where the track is, not the ideal braking point for your specific car's speed and weight. Relying on it teaches you to follow a green line instead of learning track topology. Use the minimal HUD and learn the brake markers.
Your Next 10 Hours: The Clear Path
Once your first hour is locked in, the path forward is straightforward. Complete one festival championship to unlock the next tier of events. Focus on unlocking all five festival sites to maximize your fast-travel network. Spend credits on upgrading your single mastery-invested car to A-class. Only then should you diversify your garage.
The game wants you to bounce between fifty different cars. Resist that. A single well-upgraded, mastery-boosted A-class car will carry you through 80% of the early and mid-game content without forcing you into the upgrade menu every fifteen minutes.
Frequently Asked Questions
Can you turn off Drivatar difficulty scaling entirely?
No. The hidden scaling is baked into the career progression backend. You can lower the manual difficulty slider, but the game will still adjust AI aggression based on your early win margins.
Does the starting car choice actually matter?
Mechanically, no. Any car can be upgraded to win any event. Economically, yes. A car with a cheap upgrade path saves you hundreds of thousands of credits in the first ten hours compared to an exotic that requires rare, expensive parts.
Should you buy the VIP or Car Pass before starting?
Not for progression. The Car Pass gives you cars, but early game progression is gated by festival completion and skill points, not garage size. Buy it if you want specific vehicles, not for a speed advantage.


