Stop chasing codes first. The weekend reroll codes are free, but burning them immediately is how you end up with a decent race on a character you built wrong. Your first hour should go: tutorial island → unlock the anvil → understand how ore rarity tiers interact with your class passive before you reroll anything. The codes aren't going anywhere. Your early stat allocation is.
The Anti-Consensus: Rerolls Are a Trap Without a Plan
Most players hit the codes page, redeem everything, and spam rerolls until they see a purple name. This is backwards. The Forge [Beta] uses a class-race synergy system where your race passive modifies how your class ability scales with specific ore tiers. A "rare" race with no synergy for your planned build is worse than a common race that doubles your main stat.
Here's what the tutorial skips: your race tooltip shows base modifiers, but hidden scaling coefficients apply differently across weapon types. Daggers and greatswords pull from different stat weights even when they list the same primary attribute. The game doesn't surface this. You have to test it.
The real decision archaeology here is why the devs made rerolls the primary monetized reward. It creates a slot-machine loop that feels productive while distracting from the actual build-planning the game demands. Codes give you pulls on that machine. Smart players use them after they've tested a build archetype, not before.
Race selection trade-off matrix:
| Priority | What You Gain | What You Sacrifice |
|---|---|---|
| Reroll for highest rarity | Bragging rights, potentially strong passive | May mismatch your intended weapon/ore path; wastes codes on RNG |
| Pick for weapon synergy | Consistent damage scaling, smoother island progression | Lower peak potential if you later switch weapon types |
| Pick for ore-tier focus | Efficient mining → crafting pipeline | Vulnerable to island updates that shift ore distributions |
The asymmetry: weapon synergy matters more in early islands where ore variety is low. Ore-tier focus pays off later but requires patience most players don't have. If you're planning a short session, go weapon. If you're committing to the grind, ore-tier scaling wins.

What the Tutorial Under-Explains: Runes, Totems, and the Crafting Pipeline
The tutorial teaches you to mine, smelt, and forge. It does not teach you that the crafting menu has a hidden "efficiency breakpoint" where using lower-tier ores in bulk outperforms saving for single high-tier items. This matters because inventory space is your real early constraint.
Three mechanics worth your attention:
Rune application order. Runes have diminishing returns when stacked on the same stat. The first +5% crit rune gives full value. The second gives roughly 60% of tooltip. The game doesn't display this. Spread runes across stats or save duplicates for alt gear rather than overwriting.
Totem timing. Miner's Totems (from codes like FORGE2M) boost ore find rate but also increase spawn variance. Pop one when you're planning a dedicated mining loop, not when you're exploring a new island. The variance means you'll see more rare nodes but also more empty pockets. If you're mapping an island blind, you're wasting half the buff on navigation.
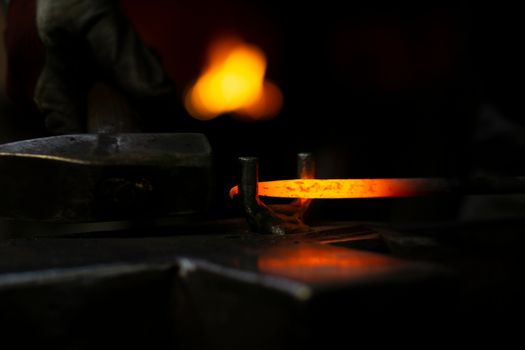
The anvil queue. You can queue multiple crafts and log out. Progress continues. Most players stand there watching bars fill. Don't. Queue your longest craft before you exit, especially overnight. The beta has no queue cap that I've hit.
Mistake that wastes time: smelting all ore immediately. Raw ore stacks to 99. Smelted bars stack to 20. Your inventory chokes faster if you process everything. Smelt only what you need for queued crafts, or what you plan to sell. The exception: event ores that expire. Those process immediately or lose them.
Your Next Three Decisions
Decision one: pick your first island lock-in. After tutorial, you have access to two islands. One has dense iron/copper (better for melee crafting), the other skews crystal/gem (better for rune-enhanced builds). You can backtrack, but travel time is punishing early. The hidden variable: island choice affects which code-era totems are most valuable. Iron-dense islands make Miner's Totems shine. Crystal islands favor Luck Totems (when available).
Decision two: commit to a weapon class before your second reroll. Test both dagger and greatsword on tutorial mobs. Check your damage variance, not just average hits. Some races have hidden variance modifiers that show up only in the combat log, not the stat sheet. If your hits swing wildly, you probably have one. Build around consistency or burst accordingly.
Decision three: when to spend versus hoard. Rerolls are finite even with codes. The game adds new codes roughly weekly per the pattern (FORGEWEEKENDS5 through 10). If you're sitting on 30+ rerolls, you're safe to spend 10-15 hunting a synergy. Below 20, save for when you understand your build. The opportunity cost of a bad reroll isn't just the code—it's the session you spend compensating for a mismatched passive.

The One Thing to Do Differently
Spend your first twenty minutes without redeeming any codes. Mine, craft one weapon of each type, check your combat log for variance patterns, and decide what actually feels good. Then redeem. Then reroll with intent. The codes are a reward system designed to feel like progress. Actual progress is understanding your build before the RNG starts.
This guide is based on beta mechanics as of May 2026. Systems may shift. Verify current code validity before redeeming.


