You will fail checks. The game wants this. Your real goal in the opening hour isn't passing skill rolls—it's positioning yourself to pass the right ones later, while not locking yourself out of the investigation's most consequential paths. Ignore the tutorial's gentle pacing. Treat the first day as a resource-gathering sprint disguised as a bender.
The Anti-Consensus: Your Build Matters Less Than Your Clock
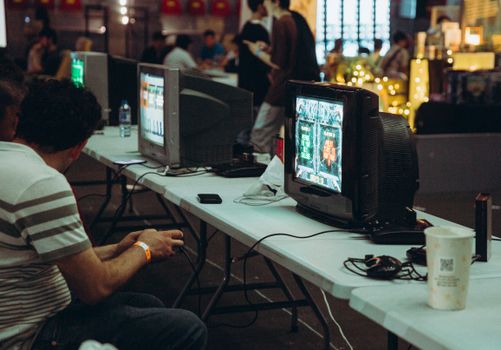
Most guides obsess over the 12-skill point allocation at character creation. Here's what they miss: your starting time is the hidden resource. The game runs on a scripted clock—conversations advance it, but walking around and examining objects usually doesn't. This means you can loot an entire district's worth of containers, dialogue-free experience, and hidden items before triggering any time-advancing plot beats. The tutorial area (the Whirling-in-Rags and immediate waterfront) contains roughly 15-20 interactable objects that give experience or items with zero time cost. Grab them all before talking to Garte the second time or examining the body. Once time starts moving, certain characters leave, doors lock, and you lose access to free resources forever.
The build anxiety is overblown because Disco Elysium's difficulty curve inverts around day 3. Early checks are hard regardless of stats; late checks become trivial through accumulated thought cabinet bonuses, clothing, and learned information. A "bad" build with 2s in your main skills still clears the game if you looted efficiently early and didn't burn your money on healing items you didn't need.

What the Tutorial Under-Explains: The Thought Cabinet Economy
The thought cabinet isn't a flavor bonus. It's a character progression system with a hidden cost structure that reshapes your build mid-game. Here's the mechanic most players misunderstand:
| Cabinet Action | Time Cost | Mechanical Effect |
|---|---|---|
| Internalize a thought | 0.5–1.5 hours in-game | Unlocks permanent bonuses, sometimes penalties |
| Research slot (first) | Free at level 2 | Opens at game start |
| Research slots 2–3 | Requires level 3, then 4 | Gated by total experience |
| Forget a thought | Costs a skill point | Destroys the thought permanently |
The trap: players internalize thoughts immediately because the UI glows. Don't. Many thoughts carry penalties during research (slower movement, lost money, reduced skill checks) that hurt more in early game than the eventual bonus helps. The optimal play is to collect thoughts through dialogue (they appear as orb icons) but delay internalizing them until you've read the full description and know the research penalty.
Example trade-off: "Wompty-Dompty Dom Centre" gives +2 to all Encyclopedia checks after 3 hours research, but during those 3 hours it applies -2 Suggestion. Early game, you may want Suggestion for certain dialogue options. You can slot this on day 2 or 3 when you have more research slots and can afford to have one tied up.
Hidden variable: some thoughts become unavailable if you internalize others. "Advanced Race Theory" and "Revolutionary" thoughts conflict in ways the game never flags. The cabinet has soft faction-alignment logic. Picking up too many "cop of the apocalypse" thoughts locks out "by-the-book" thoughts later, and vice versa. This matters for the political resolution of the case.

Mistakes That Waste Resources
Healing items are a noob trap. The game presents them as standard RPG consumables. They're not. Magnesium, speed, and alcohol all heal morale or health, but each carries hidden thresholds. Two drinks in an hour and you unlock the "Alcoholic" thought—which has brutal early penalties. Two magnesium doses and you risk a heart event that locks out certain dialogue. The optimal healing method is sleeping (free, advances plot, unlocks dreams) or the "Wirral" thought if you can get it early. Save consumables for emergency check retries, not topping off after every conversation.
Don't pay Garte for the room on day 1. You can sleep in the dumpster behind the Whirling for free, with only minor skill check penalties. The 20 real you save is two tool purchases or a critical bribe later. Paying early also triggers a time-advance event (Garte's extended dialogue) that you want to delay.
The "white check" retry myth. White checks can be retried after leveling the relevant skill or acquiring specific information. But here's what the UI doesn't say: some white checks have hidden retry conditions that aren't skill-based. A failed Authority check with Measurehead can be retried after finding his passport—a fact check, not a level check. Before burning a skill point to retry, exhaust dialogue with related characters. The game hides more fact-based retries than it advertises.
Money sinks to avoid:
- Buying clothes from the pawn shop before checking all dumpsters (unique free clothing exists)
- Paying for Kim's damage to your room (dialogue workaround exists with Composure 4+)
The Next Three Decisions That Shape Your Run
Decision 1: How you handle the body (hour 1–2).
You must examine the hanged man to advance, but the order of examination matters. Checking the boots first triggers a Shivers check that, if passed, reveals a hidden item under the boardwalk. Checking the neck first triggers an Encyclopedia check that advances time. The boot-first path gives you a tool worth 8 real and a hidden dialogue option with the Hardie boys later. The neck-first path gives information you can get elsewhere. Always: boots, then pockets, then body, then surroundings.
Decision 2: Whether to pursue the union or the company first (hour 2–4).
This isn't just faction choice—it's difficulty selection. The union path (Evrart Claire) gates progress behind multiple high-Red checks and a hidden time sink (the dockworkers' strike timing). The company path (Joyce Messier) gives information freely, advances multiple quest logs, and unlocks fast travel. However, going company-first soft-locks certain union dialogue unless you have specific Intellect thoughts active.
The asymmetry: union-first is harder early but unlocks a unique thought ("Kingdom of Conscience") that trivializes late-game morale checks. Company-first is smoother but leaves you vulnerable to a specific late-game despair event. There's no "correct" choice, but most new players stumble into company-first because Joyce is friendlier. Know that you're making a trade.
Decision 3: Your first thought cabinet slot (hour 3–6).
The first researchable thought you encounter is usually "Some Kind of Superstar" (from looking in the mirror) or "Wompty-Dompty Dom Centre" (from Encyclopedia triggers). Neither is optimal for slot 1. The best early thought is "Actual Art Degree" (requires Visual Calculus check on the mural in the starting plaza)—it gives +1 to all Intellect skills and has no research penalty. If you can't reach it, "Rigorous Self-Critique" (from failing a check, any check) gives +1 to all Psyche skills with only a minor movement speed penalty.
The trap: "Some Kind of Superstar" applies -2 Logic during its 6-hour research. Early game, you need Logic for deduction and certain dialogue options. Slotting this on day 1 makes investigation sequences noticeably harder.
What to Do Differently
Stop treating Disco Elysium like a standard RPG where you clear an area and move on. It's a time-locked resource puzzle where the optimal play is often avoidance—avoiding dialogue that advances clocks, avoiding consumables that trigger hidden states, avoiding the obvious path because it costs more than it gives. Your first hour sets the margin that determines whether day 3 feels like a detective story or a desperate scramble for rent money. Loot first, talk second, and never internalize a thought without reading the full research penalty.


